

Whether you're looking for the perfect finishing touch or just want a quick, satisfying little project, the crochet I-cord is one of those techniques that instantly feels useful. It's sturdy, beautiful, and surprisingly easy once you get the hang of it. And while knitters have long embraced I-cords, crocheters can make them too—with just a hook and a bit of yarn.
In this post, I’ll walk you through exactly how to crochet an I-cord step by step, show you some tips for keeping it neat and even, and share a few ways you can use I-cords in your crochet projects. Let's dive in!
A crochet I-cord is a narrow, tube-like strip made with just a few stitches that are worked in a way that makes them curl into a round, rope-like shape. It's similar in function and appearance to a knit I-cord, but done entirely with a crochet hook.
The end result is a thick, durable cord that's perfect for:
Crocheted I-cords are a great way to use up scrap yarn and add a handmade touch to your projects.
For the crochet I cord, you’ll need:
This technique works with just about any yarn, so feel free to experiment once you're comfortable with the basics.
Let’s walk through how to crochet a 3-stitch I-cord, which is the most common version. Once you’ve practiced this, you can try adjusting the number of stitches depending on how thick or thin you want your cord to be.
Start with a slip knot and then chain 3 stitches.
These 3 chains will form the base of your I-cord.

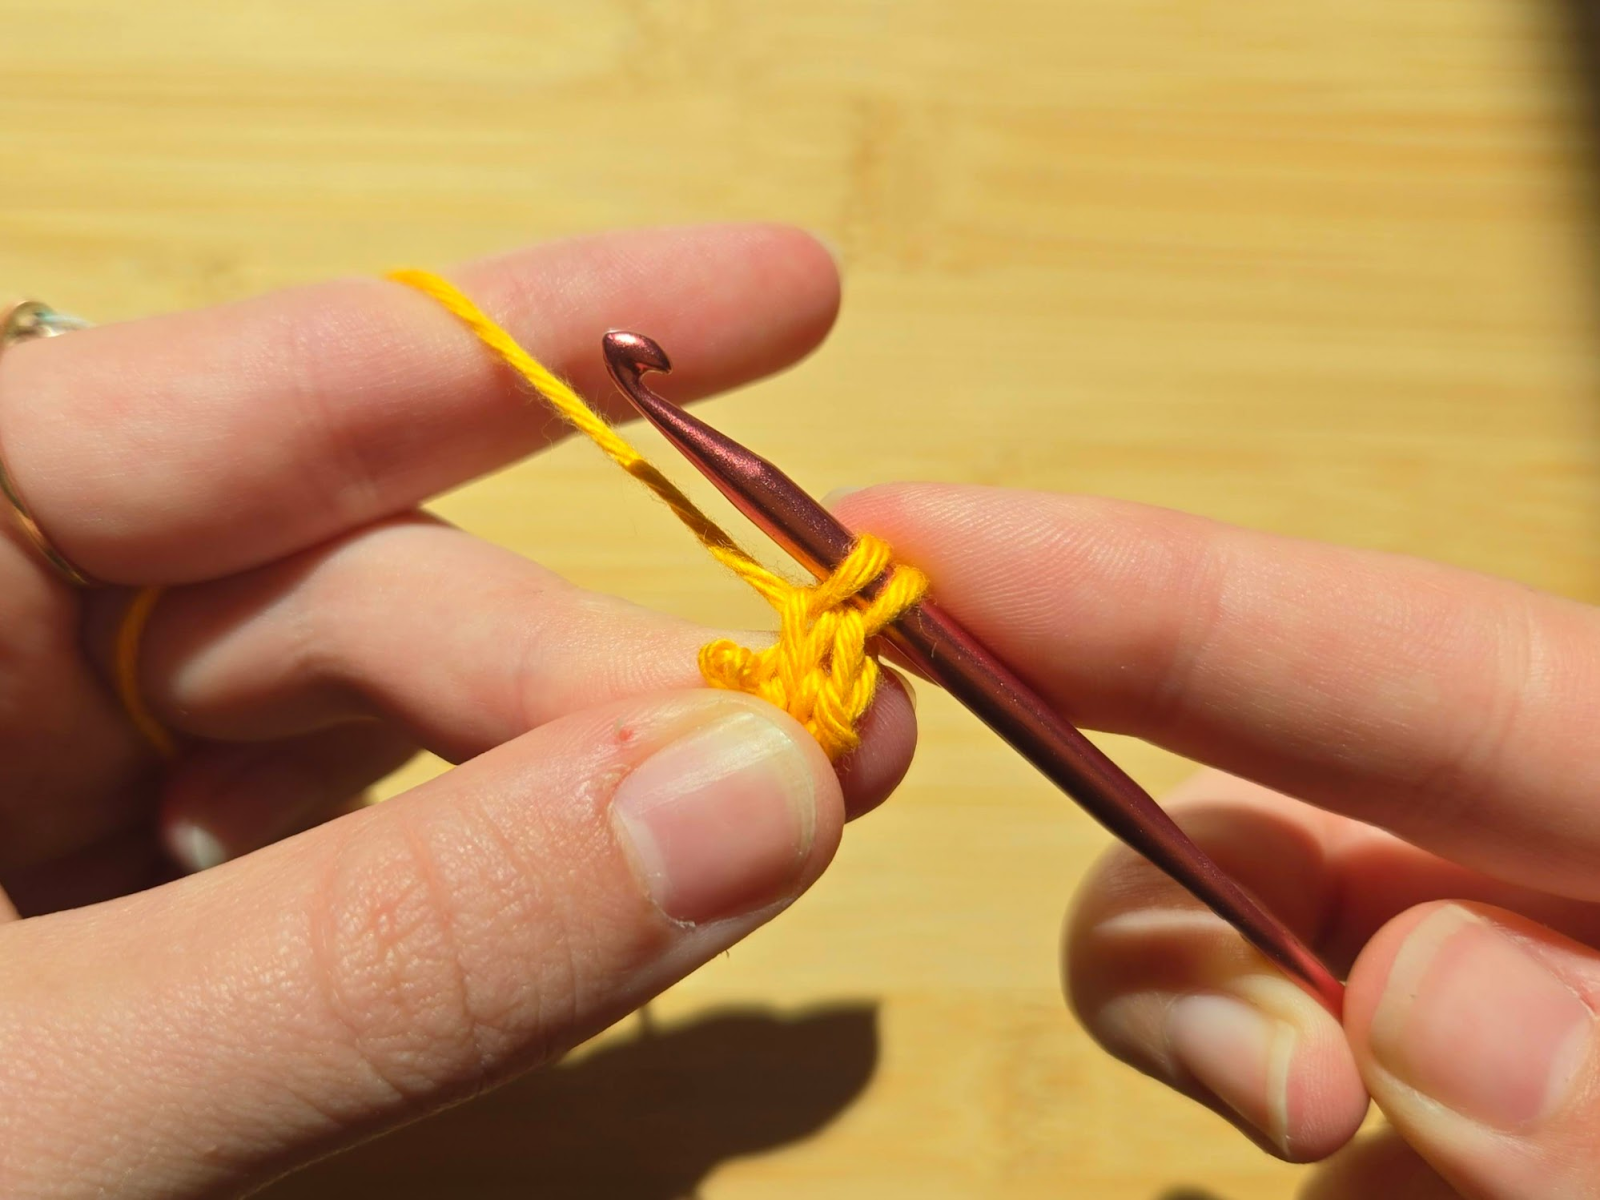
Now skip the first chain closest to your hook and insert your hook into the second chain. Yarn over and pull up a loop. Leave this loop on your hook.

Do the same with the third chain: insert your hook, yarn over, pull up a loop, and leave it on the hook.

You should now have 3 loops on your hook.

Gently remove the last 2 loops from your hook, pinching them in place with your fingers so they don't unravel. It’s a little fiddly at first, but you’ll get used to it quickly.

With just one loop on your hook, yarn over and pull through it like a normal single crochet.


Now pick up the second loop you had set aside.

Reinsert your hook, yarn over, and pull through that loop.
Pick up the third loop, yarn over, and pull through the loop.

You're back to having 3 loops on your hook, and you’ve completed your first round of the I-cord!

Continue repeating these steps: remove the last two loops, hold them securely, yarn over and pull through the first loop, then pick up the next loops one by one and pull through each.

With each repetition, you’ll see your I-cord growing downward, curling into a tidy rope.

Here are a few things I’ve learned from making lots of I-cords that might help you too:
Totally possible!
Experiment and see what works for your project.
When your cord is the length you want, you can fasten it off by cutting the yarn, then:


That’s it! You now have a sturdy, beautifully rounded I-cord ready to go.
Once you learn how to make them, you’ll find so many uses for crochet I-cords. Here are just a few ideas:
I-cords are perfect for drawstring bags or even as backpack straps. They’re durable, flexible, and way more polished-looking than a simple chain.
Want to give a scarf, shawl, or blanket a little something extra? Attach an I-cord border to the edge—it’s a subtle detail that makes a big difference.
Make a necklace or bracelet by crocheting an I-cord in a fine cotton yarn. Add some beads or a clasp, and you’ve got a unique handmade accessory.
For baskets or pouches, I-cords make fantastic handles. They're strong enough to hold weight and look great at the same time.
Use I-cords as hanging loops for your wall art, or even incorporate them into your design as 3D embellishments.
The crochet I-cord might look a little tricky the first time you try it, but once you get into the rhythm, it becomes a meditative and satisfying stitch to work. Whether you’re adding a drawstring to a pouch or just playing around with yarn scraps, the I-cord is a versatile skill that’s definitely worth learning.
Looking for more crochet tips and tutorials? Follow the quick links below for other beginner stitches or head straight to the full crochet stitches page of my website!
How to Crochet a Cluster Stitch


